Concreting guide
What do you need to know before pouring a shed slab in your backyard?
Before you pour a shed slab, you need to know three things: what the council requires, what your soil is doing, and what thickness and reinforcement the slab actually needs. Get those three right and the rest falls into place. Get them wrong and you are looking at a cracked, sunken or non-compliant slab that costs more to fix than it did to build.
What Council Approval Actually Means for a Shed Slab in Brisbane
Most homeowners assume a small backyard shed is exempt from council approval. Sometimes that is true. Brisbane City Council allows certain exempt development under the Brisbane City Plan 2014, but the exemptions are specific and easy to misread.
As a general rule, a shed up to 10 square metres on a standard residential block can proceed without a building approval, provided it meets setback rules, height limits and is not in a flood overlay or character overlay area. Once you go above 10 square metres, or if your block sits in a residential character overlay (common in suburbs like Wynnum and parts of Manly West), you typically need a building approval before you do anything.
The slab itself is part of the structure. So if the shed needs approval, the slab does too. A certifier will want to see footing depths, reinforcement details and sometimes a geotechnical report, depending on the site.
The practical step: before you get a single quote, call Brisbane City Council's planning line or use their PD Online search tool to check your property's overlays. It takes 20 minutes and saves a lot of grief.
Soil Conditions in the Bayside Suburbs and Why They Matter
Soil type drives slab design more than almost anything else. The Bayside cluster (Hemmant, Wynnum, Manly, Lota and surrounds) has variable soil conditions that are worth understanding before you commit to a thickness or reinforcement spec.
Much of the lower-lying land near the waterfront in Wynnum and Manly sits on reactive clay. Reactive clay shrinks in dry weather and swells when it gets wet. That movement puts stress on a slab. A slab that might be fine in a more stable inland suburb can crack badly on a reactive clay site if it is not designed for the movement.
Hemmant itself has areas of reclaimed and filled land near the industrial corridor, and some residential pockets on the western side that have softer subsoil. If your block was ever filled, or if you are close to the Tingalpa Creek flood plain, it is worth getting a soil test before you design the slab.
A basic soil classification report typically costs $200-$500 and tells a concreter or engineer exactly what soil reactivity class your site falls into (from class A, the most stable, through to class E and P, which are highly reactive or problem sites). On a straightforward $2,500 shed slab, spending $300 on a soil test feels painful. On a $6,000 slab that cracks in 18 months, you will wish you had.
Slab Thickness, Reinforcement and What the Numbers Mean
A standard residential shed slab in Brisbane is typically 100 mm thick with SL72 mesh reinforcement (steel mesh laid through the concrete to manage cracking). For a small garden shed storing a lawnmower and garden tools, that is usually adequate.
But the spec changes the moment you add weight or purpose. A carport or garage where a vehicle parks needs a minimum of 100 mm, and many concreters in the Bayside area recommend 125 mm for a car because vehicle traffic is a different load case to foot traffic. If you are planning a workshop with a heavy lathe, a car hoist or a diesel generator, you may need 150 mm with bar reinforcement rather than mesh.
The reinforcement matters as much as the thickness. Mesh sits in the middle of the slab and manages shrinkage cracking. Bar reinforcement (deformed bar, or "reo bar") is used when you need genuine structural strength at specific points, like around the perimeter or under heavy point loads. Some concreters use both.
One trade-off worth knowing: thicker slabs cost more (more concrete, more labour) but they are also more forgiving on reactive soil sites because they resist differential movement better. On a class M or H site in Wynnum, going from 100 mm to 125 mm might add $300-$600 to the job and save you a repair bill down the track.
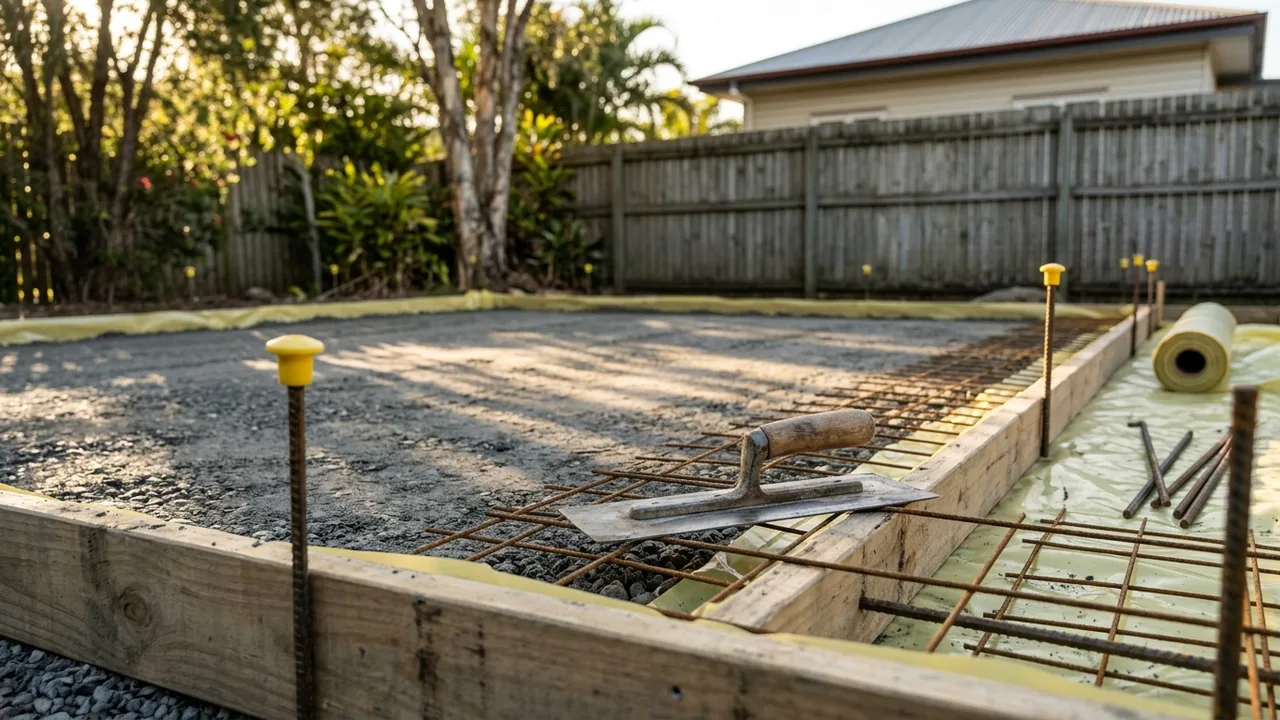
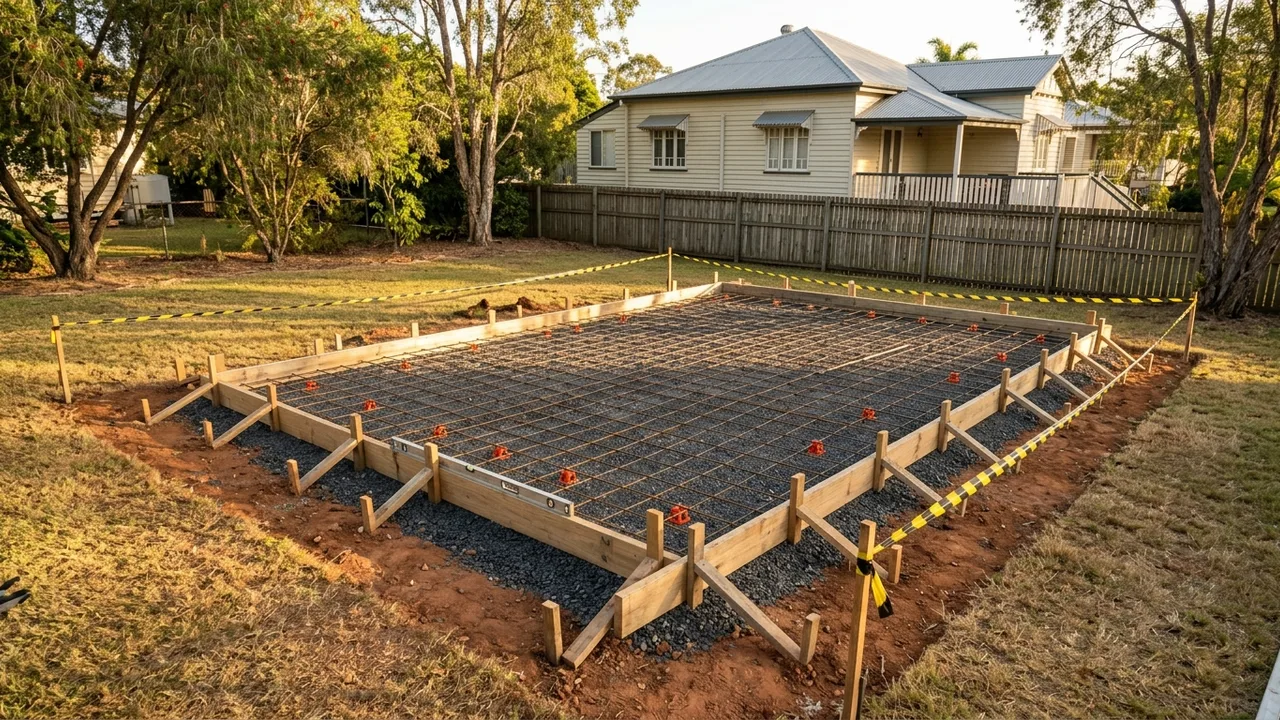
Site Preparation: The Work Before the Pour
The concrete itself is probably the smallest variable in a good shed slab. The preparation is where jobs succeed or fail.
Good preparation typically means:
- Stripping topsoil down to firm subsoil or fill. Topsoil is organic and compressible; concrete poured on it will settle unevenly.
- Compacting the subbase. A layer of compacted gravel or road base (typically 75-100 mm) gives the concrete a stable, well-drained platform. In areas with poor natural drainage, like some low-lying parts of Lota and Hemmant near the foreshore, this step is especially important.
- Setting up formwork. The timber or steel frame that holds the concrete in place while it cures. It needs to be level, solid and set to the correct finished height relative to the shed floor you want.
- Installing drainage if needed. A shed slab does not always need a floor drain, but a workshop will often benefit from one. It is much cheaper to install the drain before the pour than to core through cured concrete later.
- Placing and tying reinforcement. The mesh or bar needs to be lifted off the ground on plastic chairs so it sits in the middle of the slab, not on the bottom where it does nothing.
Skipping or rushing any of these steps is where DIY shed slabs often go wrong. The pour itself takes a morning; the preparation takes most of the day.
DIY vs Hiring a Concreter: An Honest Look at the Trade-offs
You can pour a small shed slab yourself. Concrete is available in pre-mixed bags (add water and mix) or you can order ready-mix from a truck. For a 3 m x 3 m slab, the material cost in ready-mix is roughly $400-$700 depending on thickness and concrete grade. Add reinforcement mesh, formwork timber, plastic chairs and a hired screed rail and you might spend $700-$900 all up.
What you are trading for that saving is time, physical effort and risk. Concrete does not wait. Once the truck arrives, you have a limited working window (typically 90 minutes to two hours depending on conditions and admixtures). If your formwork shifts, your mesh is out of position or you cannot screed fast enough, the slab shows it. Finishing concrete to a flat, even surface is a skill that takes practice.
For slabs above roughly 20 square metres, DIY becomes genuinely difficult without a second or third person who knows what they are doing. For a slab on a reactive clay site, or one that requires a building approval with engineering sign-off, a licensed concreter is the sensible choice.
A professionally laid shed slab in the Hemmant and Bayside area typically costs $1,500-$4,500 depending on size, thickness, site conditions and access. That range is wide because the variables are wide. Get at least two quotes and ask each tradie to explain their prep process, not just their price.
Salt Air, Drainage and a Few Bayside-Specific Details
If you are within a kilometre or so of the Moreton Bay foreshore (Manly Harbour, Wynnum Esplanade and surrounds), salt air is a real factor. Salt accelerates the corrosion of steel reinforcement if moisture gets in through cracks. This is one reason why concrete quality matters on bayside properties: a higher-strength mix (typically 25 MPa or 32 MPa rather than the bare minimum) is denser and less permeable, which slows moisture penetration.
Drainage around the slab edge also deserves attention. A slab that pools water against a shed wall creates damp problems and, on reactive clay, contributes to the moisture cycling that drives movement. A small fall away from the slab edge (25-50 mm across 3 metres is usually sufficient) is easy to build in during formwork and hard to add afterwards.
Before You Book Anything
Check your council overlays and estimate whether you need approval. Get a feel for your soil type (if in doubt, a soil test is money well spent). Decide what the slab will actually carry, because that determines thickness and reinforcement. Then get two or three quotes from licensed concreters who will visit the site rather than quote by phone.
A shed slab is not a complicated project, but it is a permanent one. A little planning at the start means you are not chasing cracks or fighting council three years later.
If you would like to talk through what your specific site might need, the team at Concreting Hemmant is happy to have a straightforward conversation before you commit to anything.
Quick answers